Rule Execution App Service for Salesforce
Next, we will deploy the InRule Rule Execution service as an Azure App Service, along with all its Azure resource dependencies. To make this process easier, we will be using an Azure Resource Manager (ARM) template, which allows us to deploy and configure all the Azure resources the Rule Execution Service relies on.
There are a number of methods for deploying an ARM template; this documentation will detail two: via Azure CLI and via PowerShell.
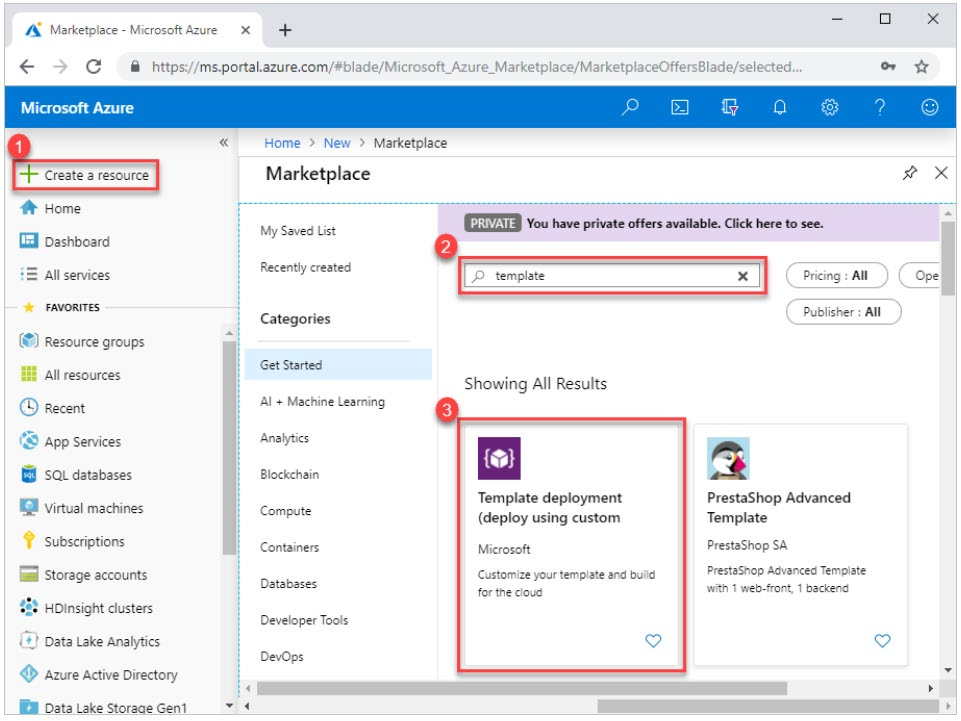
Alternatively, while this document does not provide a walkthrough of it, the ARM template provided is configured to work with Azure Portal deployment. For an overview of how to leverage ARM deployment through the Azure Portal, reference Microsoft's documentation: Deploy resources with ARM templates and Azure portal and navigate to the section titled "Deploy resources from custom template".
You can navigate directly to the Azure Portal page for deploying an ARM template at this link: Custom deployment - Microsoft Azure.
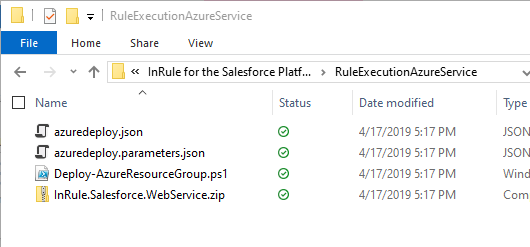
1: Locate azuredeploy.parameters.json
Before deploying the ARM template, we need to define certain parameters.
The required azuredeploy.json and azuredeploy.parameters.json files can be downloaded here - AzureAppServices/Salesforce at master · InRule/AzureAppServices · GitHub.
Alternatively, they can be located within the InRule for Salesforce.zip file downloaded in Optional Resource Files.
2: Update parameters
Before completing this section, make sure you have the following credentials:
- Salesforce Credentials
- Salesforce API Security Token
- Salesforce Connected App
- InRule Catalog credentials
Open the file with your text editor of choice and edit the parameters listed below
{
  "$schema": "https://schema.management.azure.com/schemas/2015-01-01/deploymentParameters.json#",
  "contentVersion": "1.0.0.0",
  "parameters": {
    "appServiceName": {
      "value": ""
    },
    "sfLoginUrl": {
      "value": "https://login.salesforce.com/services/oauth2/token"
    },
    "sfUsername": {
      "value": ""
    },
    "sfPassword": {
      "value": ""
    },
    "sfSecurityToken": {
      "value": ""
    },
    "sfConsumerKey": {
      "value": ""
    },
    "sfConsumerSecret": {
      "value": ""
    },
    "catalogUri": {
      "value": ""
    },
    "catalogUser": {
      "value": "admin"
    },
    "catalogPassword": {
      "value": "password"
    },
    "ruleAppLabel": {
      "value": ""
    },
    "executionServiceApiKey": {
      "value": ""
    },
    "appServicePlanName": {
      "value": ""
    },
    "createOrUpdateAppServicePlan": {
      "value": true
    },
    "inRuleVersion": {
      "value": "5.8.0"
    },
    "appInsightsResourceName": {
      "value": ""
    },
    "appInsightsInstrumentationKey": {
      "value": ""
    },
    "appInsightsConnectionString": {
      "value": ""
    }
  }
}
| # | Parameter | Description |
|---|---|---|
| 1 | appServiceName | Provide a name for the Azure App Service that the Rule Execution Service will run on. Note, by default, an App Service Plan will be created by the ARM template. The App Service Plan will follow the naming convention of the App Service name you provide here, with "Plan" appended to the end (ex. appServiceNamePlan). If you wish to deploy your app service to an already existing App Service Plan rather than create a new one, or for more information on the necessary configurations for the App Service Plan, reference Azure App Service Plan and Application Insights Configuration |
| 2 | catalogUri | The URI for the Catalog Service that will be used Example: https://myappinruledevcatalogservice.cloudapp.net/service.svc |
| 3 | catalogUser | Username for Catalog Service, default value is 'admin'. |
| 4 | catalogPassword | Password for Catalog Service, default is 'password', please change this using the catalog manager! |
| 5 | ruleAppLabel | Optionally supply a default label used by the execution service to identify the ruleapp version to run. |
| 6 | sfLoginUrl | The default for this is set to https://login.salesforce.com/services/oauth2/token, but you can change this to the relevant URL for your instance if you are deploying to something like a sandbox instance |
| 7 | sfUsername | Salesforce username for the service account used to connect from the execution service to the Salesforce API |
| 8 | sfPassword | Password for the Salesforce service account |
| 9 | sfSecurityToken | API token for the Salesforce service account. Security tokens are required unless the service account will be connecting from an IP address that falls in a trusted IP range configured in Salesforce. |
| 10 | sfConsumerKey | OAuth consumer key for the connected app |
| 11 | sfConsumerSecret | OAuth consumer secret for the connected app |
| 12 | executionServiceApiKey | Api key used to secure the rule service. This same api key will need to be provided to Salesforce during configuration |
| 13 | inRuleVersion (To deploy most modern version, leave as default value) | This parameter allows the user to configure what version of the InRule Rule Execution Service they wish to deploy. By default, this parameter will be set to the most modern version. |
| 14 | appServicePlanName (If you wish to override the default value) | Provide a name for the Azure App Service Plan. If you leave this value blank it will be derived as the App Service name you provide above, with "Plan" appended to the end (ex. appServiceNamePlan). Note, by default, an App Service Plan will be created by the ARM template. If you wish to deploy your app service to an already existing App Service Plan rather than create a new one, or for more information on the necessary configurations for the App Service Plan, reference Azure App Service Plan and Application Insights Configuration |
| 15 | createOrUpdateAppServicePlan | By default, this value is set to true, and an App Service Plan will be created by the ARM template. If you wish to deploy your app service to an already existing App Service Plan rather than create a new one, set this value to false and reference Azure App Service Plan and Application Insights Configuration. |
| 16 | appInsightsResourceName (If you wish to create a new AI resource) | If you want to use Application Insights as a log sink in addition to the app service logging already enabled, but do not already have an Insights resource that you want to use, specify a name for a new resource here. Specifying a value for this parameter will create a new Application insights resource with the given name and populate the instrumentation key app setting on the app service with the key from this new resource. If you provide a value for this parameter, do not provide a value for appInsightsInstrumentationKey. |
| 17 | appInsightsInstrumentationKey (If you wish to use an existing AI resource) | Provide an Instrumentation Key if you have an existing App Insights resource you'd like to use for logging and telemetry. If you are configuring this in a nonstandard environment (such as Azure Government), please additionally provide an App Insights Connection String. Otherwise, leave this value blank and provide a value for the 'appInsightsResourceName' parameter, which will create the resource for you. For more information on the logging view Rule Execution Service Event Log. |
| 18 | appInsightsConnectionString (If you wish to use an existing AI resource in a non-standard Azure environment) | Only override the default value here if you have an existing App Insights resource you'd like to use, AND you need to use a non-standard connection string, be sure to set that value here, as well as providing your instrumentation key in the appInsightsInstrumentationKey parameter. If you want this template to manage the App Insights for you, or only need to provide an instrumentation key, leave this value as the default and provide values for appInsightsResourceName or appInsightsInstrumentationKey instead. Additionally, for any consideration about using app insights or setting it up in a non-standard Azure environment view Azure App Service Plan and Application Insights Configuration |
Once you have finished configuring your parameters, save the completed parameters file and keep a spare copy on hand for future upgrades or automation.
Option 1: Deploy ARM Template with Azure CLI
Now that the ARM template is configured, we'll deploy it to get the resources up and running. The following will detail how to use the Azure CLI to deploy the ARM template (Note, this section assumes Azure CLI has already been installed):
3.1 Run Command Prompt
3.2 Navigate to the RuleExecutionAzureService folder
C:\>cd RuleExecutionAzureService

C:\RuleExecutionAzureService>
3.3 Enter "az login" to login into Azure
C:\RuleExecutionAzureService>az login
3.4 Enter your Azure admin credentials to login when prompted in the new browser window opened

3.5 Select the appropriate subscription
If your Azure account has access to multiple subscriptions, you will need to set your active subscription to where you create your Azure resources:
C:\RuleExecutionAzureService>az account set --subscription SUBSCRIPTION_NAME
3.6 Create Resource group
If you have not created a resource group yet, you will need to create one. You will need to define a name and a geographic location for where to host the resource. This example uses Central US:
C:\RuleExecutionAzureService>az group create --name ResourceGroupName --location centralus
3.7 Execute the following command to deploy the ARM template
Replace "ResourceGroupName" with the name of the Azure Resource Group you want to deploy to
C:\>az deployment group create -g ResourceGroupName --template-file .\azuredeploy.json --parameters .\azuredeploy.parmeters.json
Observe that the template deploys with no errors
Option 2: Deploy ARM Template with PowerShell
(If you have already deployed the ARM template via Azure CLI in the section above, this section is not necessary)
Now that the ARM template is configured, we'll deploy it to get the resources up and running. The following will detail how to use Powershell to deploy the ARM template (Note, this section assumes Azure PowerShell has already been installed):
1.1 Run Powershell
1.2 Navigate to the RuleExecutionAzureService folder
PS C:\> cd .\RuleExecutionAzureService\
PS C:\RuleExecutionAzureService>
1.3 Enter "Connect-AzureRmAccount" to login into Azure
PS C:\RuleExecutionAzureService> Connect-AzureRmAccount
1.4 Enter your Azure admin credentials to login when prompted in the new browser window opened
1.5 Select the appropriate subscription
Upon logging in, your default subscription information will be displayed:

If this is not the subscription you want to deploy to, you can use the "Select-AzureRmSubscription" cmdlet to change the targeted subscription. Just replace "SubscriptionNameHere" with the name of the desired subscription:
PS C:\RuleExecutionAzureService> Select-AzureRmSubscription -SubscriptionName SubscriptionNameHere
4.6 Create Resource Group
If you have not created a resource group yet, you will need to create one. You will need to define a name and a geographic location for where to host the resource. This example uses Central US:
PS C:\RuleExecutionAzureService> New-AzureRmResourceGroup -Name ResourceGroupName -Location centralus
4.7 Execute the following command to deploy the ARM template
Replace "ResourceGroupName" with the name of the Azure Resource Group you want to deploy to
PS C:\RuleExecutionAzureService> New-AzResourceGroupDeployment -ResourceGroupName ResourceGroupName -TemplateFile .\azuredeploy.json -TemplateParameterFile .\azuredeploy.parameters.json
Observe that the template deploys with no errors
Verify Setup
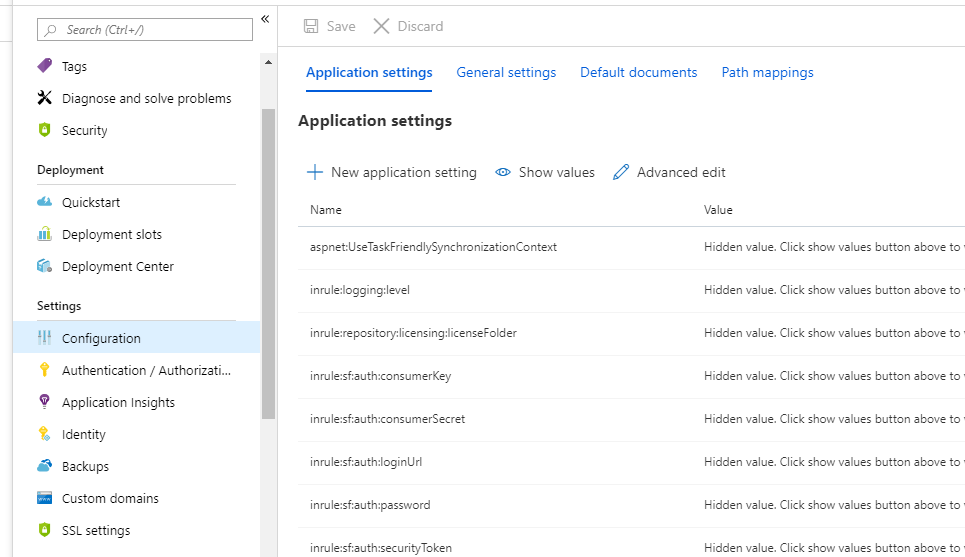
Navigate to the Azure portal and locate the deployed App Service

Ensure that all of the app settings are configured correctly for your setup
Upload License File
Next, you'll need to upload a license file to the web app service in order for the Rule Execution App Service to properly function. The simplest way to upload the license file is via the Azure App Service Editor. Alternatively, you can deploy the license file via FTP. Walkthroughs of both these approaches can be found in License Management.