Regression Testing With Dynamics 365 Records
This section describes how to create a Test Suite using Microsoft Dynamics 365 records. Test Suites can be used to run the rules against records in Microsoft Dynamics 365 and then test the end results using a set of assertions. For example, if the final price on various quotes is calculated by a complex set of rules you might want to create a test suite to check the final price and some of the interim values on a set of quotes. Rerunning the test suite every time rules are changed can be a good way to make sure no inadvertent changes were made.
Select the Test Entity
To create a Test Suite using a Microsoft Dynamics 365 record, first select the Entity you wish to test. To do this, select the Entity or one of its children either in the irAuthor Entities view or the irAuthor Rules View.
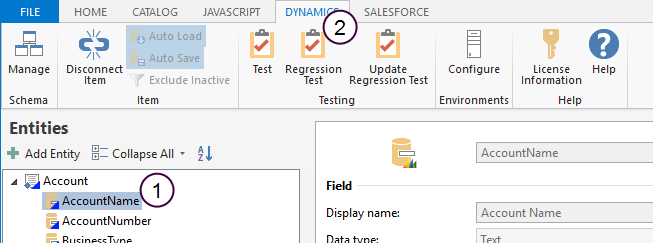
- Select the Entity you wish to test. Here, the "Account" Entity is selected.
- On the ribbon, click the Regression Test button.
The Select Microsoft Dynamics 365 Environment window appears.
Select the Microsoft Dynamics 365 Environment
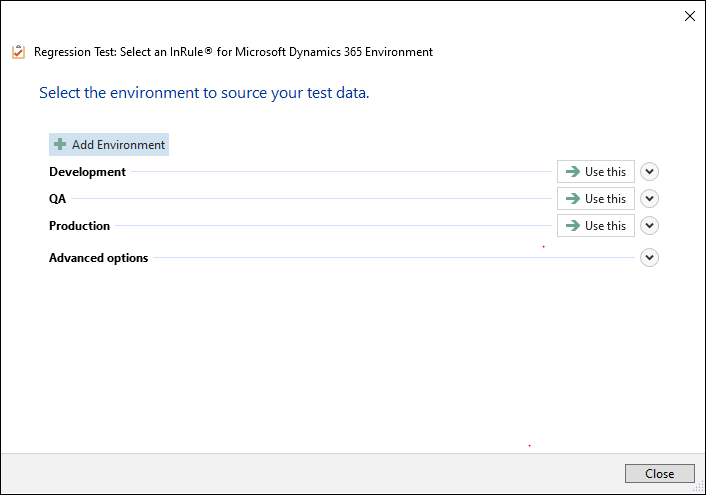
Select the environment you want to use to update the Test Suite by clicking the "Use this" button.
Select Records
Use the Select Test Data window to select the Microsoft Dynamics 365 records for your test suite.
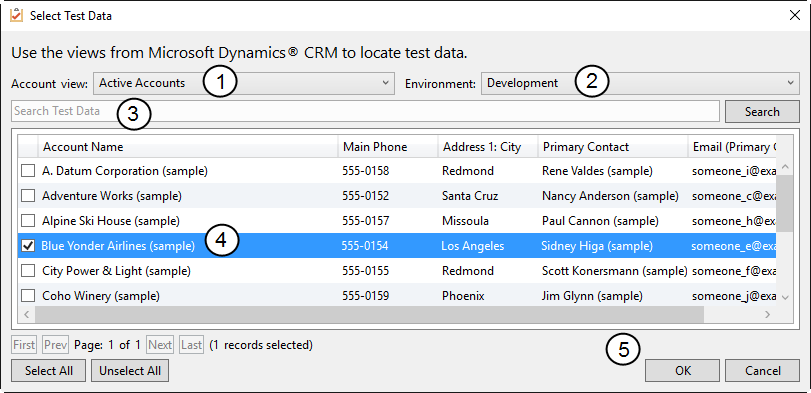
- Use the view selection drop-down, here called "Account view," to select the view you want.
- Select the appropriate Microsoft Dynamics 365 environment.
- If needed, narrow the list by searching for the record(s) you want.
- Use the check boxes to select the Microsoft Dynamics 365 records you want.
- Click OK.
A dialog appears, prompting you to save the Test Suite.
Save the Test Suite
Use the Save As window to save your Test Suite.
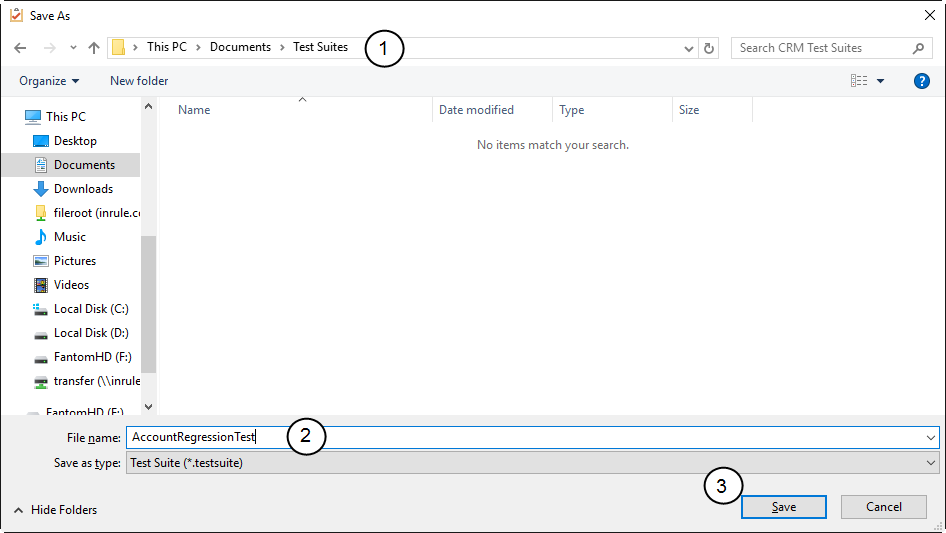
- Choose the disk location for the Test Suite.
- Type in a file name for the saved Test Suite.
- Click Save.
A message window appears with instructions for the next step.

Click OK, and the irVerify window appears.
Open the Test Suite
Once you are in irVerify, open the test suite.
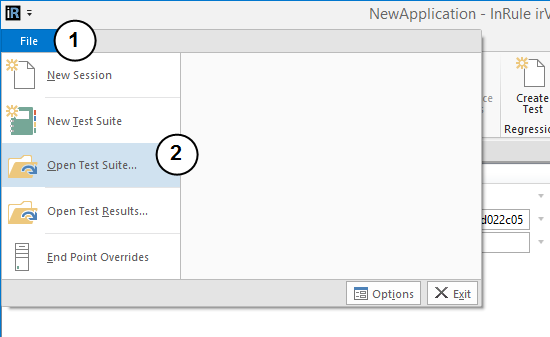
- Click File to expand the File menu.
- Click Open Test Suite.
The Open Test Suite window appears.
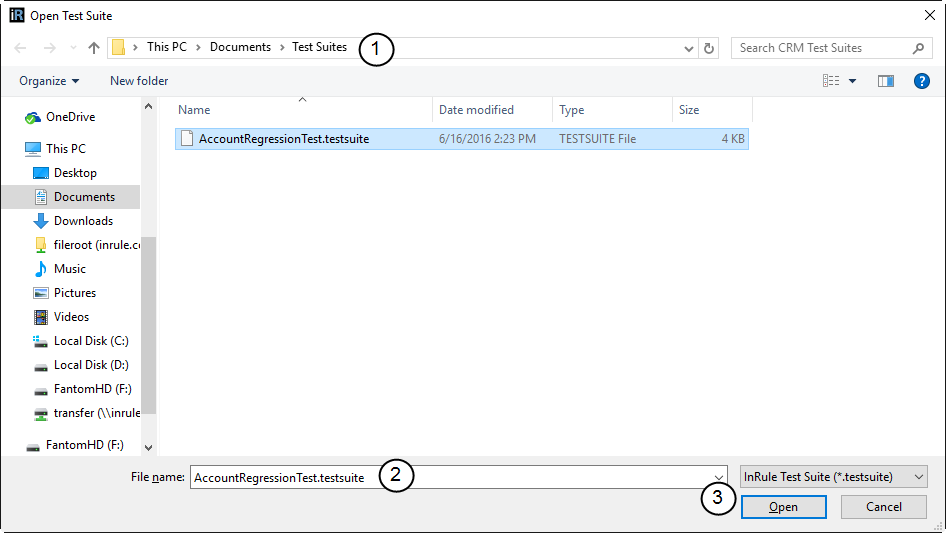
- If necessary, navigate to the location where you saved the Test Suite earlier.
- Select the Test Suite file.
- Click Open.
The Test Suite tab appears in irVerify.
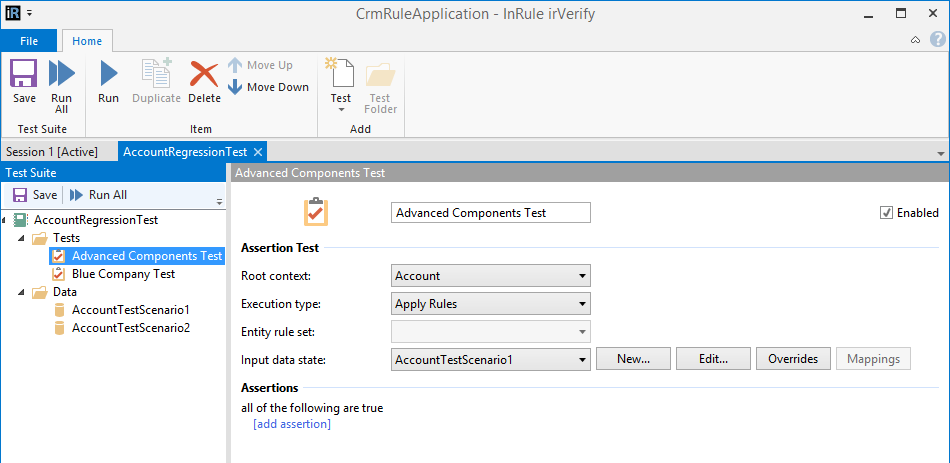
Proceed with your testing.