Configuring Dynamics 365 Environments
When irAuthor connects to a Microsoft Dynamics 365 service, it typically has a variety of services, credentials, and other options to select from in order to make the desired connection. You can specify those connection environments using the environment configuration dialog.
Select the Environment Connection Dialog
To begin, select the DYNAMICS tab of the irAuthor ribbon, then click the Configure button.

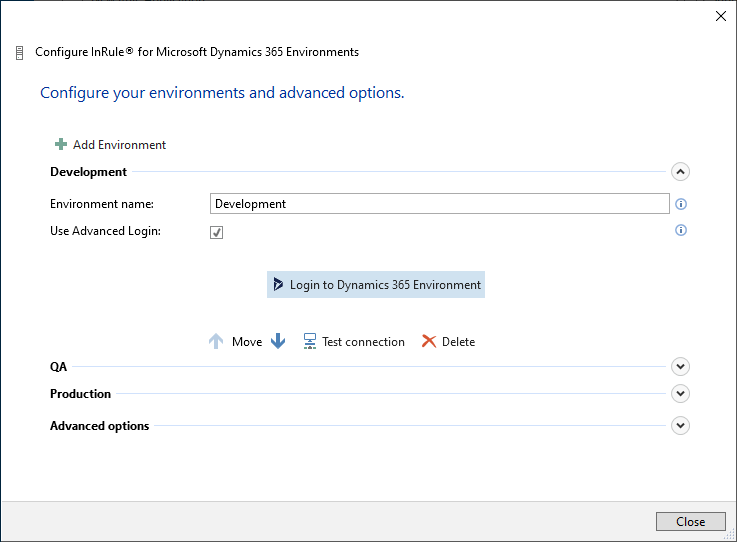
The dialog shows any environments that have been defined. If there are none, a new empty environment will display. Below we see three environments (Development, QA, and Production) and the first one has been expanded to the detail view.
Advanced Login
Advanced Login is the recommended means of environment configuration. It is the simplest and most secure, as it can utilize Multi-factor Authentication.
Select the Advanced Login checkbox and click the Login to Dynamics 365 Environment button.
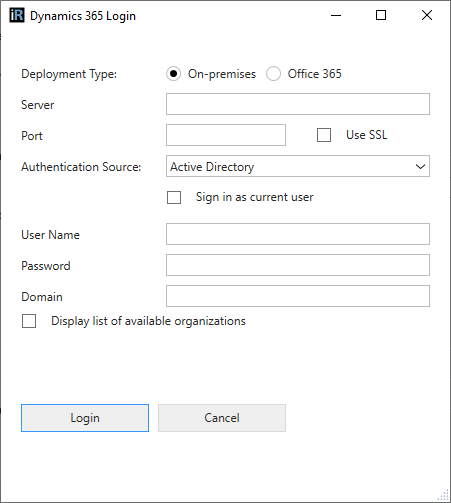
Then, with the Office 365 deployment type selected, click the Login button.
- In most scenarios, selecting Office 365 is all that is necessary, and all other options can be left unselected.
- Do not select Sign in as current user, as it is not currently supported.

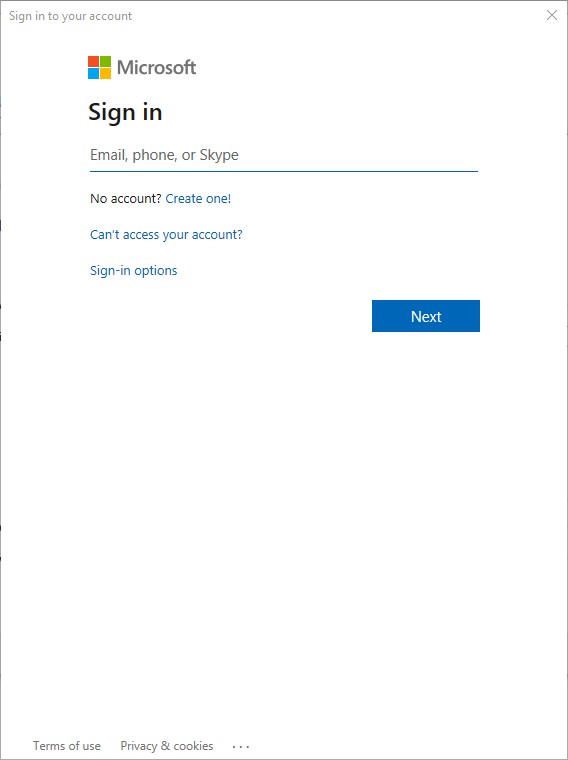
This will open a window allowing users to enter their Office 365 credentials.
The Advanced Login flow also allows users to use credentials for an On-premises environment to set up their connection.
Legacy Login
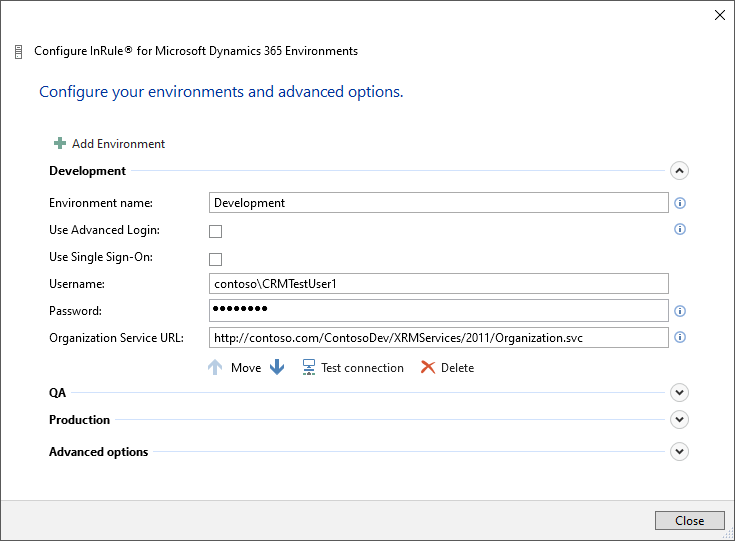
To use the Legacy Login, do not select any of the checkboxes, and simply enter the Username and Password for the environment, along with the Organization Service URL. If connecting to a Microsoft Dataverse environment, simply use the Dataverse URL as the Organization Service URL.
Single Sign-On
Use of Single Sign-On is limited to On-premises environments.
Environment Configuration Panel Usage
Use the environment configuration panel to do the following:
- Add a new environment
- Expand or collapse the detail view of an environment
- Update an existing environment
- Delete an environment
- Change the display order of the environments
- Test the connection to an environment
- Adjust the connection timeout
Add a new environment
To create a new environment, click the Add Environment button. The new environment will be placed at the end of the list.
Expand or collapse an environment detail
Initially, environments are collapsed so you don't see their details. Click the Expand button to see more details. Click the Collapse button to see fewer details.
Update an environment
If you need to update any of the fields for an environment, simply type the new value(s). The updates are saved automatically.
Delete an environment
To delete an environment definition, click the Delete button in its expanded view.
Change the order of environments
To move an environment to a new position in the list, click the Move Up or Move Down button in its expanded view.
Test an environment connection
To test the connection to the Microsoft Dynamics 365 environment, click the "Test connection" button in the expanded view.
Set the connection timeout
By default, a connection to the Microsoft Dynamics 365 server will time out after two minutes. If you experience timeout problems while communicating with the server, you might increase this value. Expand the Advanced Settings section, which applies to all environments, and edit the timeout value.
Close the dialog
Once you have defined your environments, click the "Close" button.