Dynamics 365 Rule Configurations
The Rule Configurations section provides a central location where you can configure rule execution options across the various methods of executing rules. By leveraging these Rule Configurations users can configure the Run Rules Button and events to execute Rule Sets or Decisions for a given entity, which provides the ability to run complex logic against that entity and its related entities.
At a summary level, the steps for setting up the Run Rules Button are as follows:
- Create a Rule Configuration Record
- Configure Rules Button Settings
- Create a Rule Set Configuration for each Rule Set or Decision
- Associate a Rule Configuration Record to an Entity
The Run Rules Button is also able to take advantage of Rule Sets or Decisions that utilize parameters, more information about which can be found in:
Rule Configurations can also be configured to run a Rule Set or Decision against an entity on certain events (entity create or update). The primary areas of focus for associating a Rule Set or Decisions with an event are:
These events only use the primary Rule App and the primary Rule Set or Decision that are configured on the Rule Configuration, so the Rule Set Configurations and Parameter Configurations that can be used with the Run Rules Button are not necessary.
Create or Update Rule Configuration Records
-
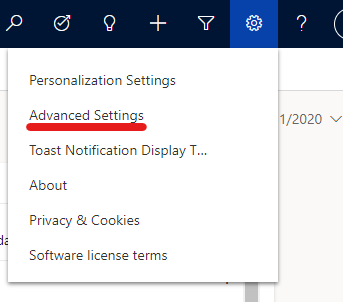
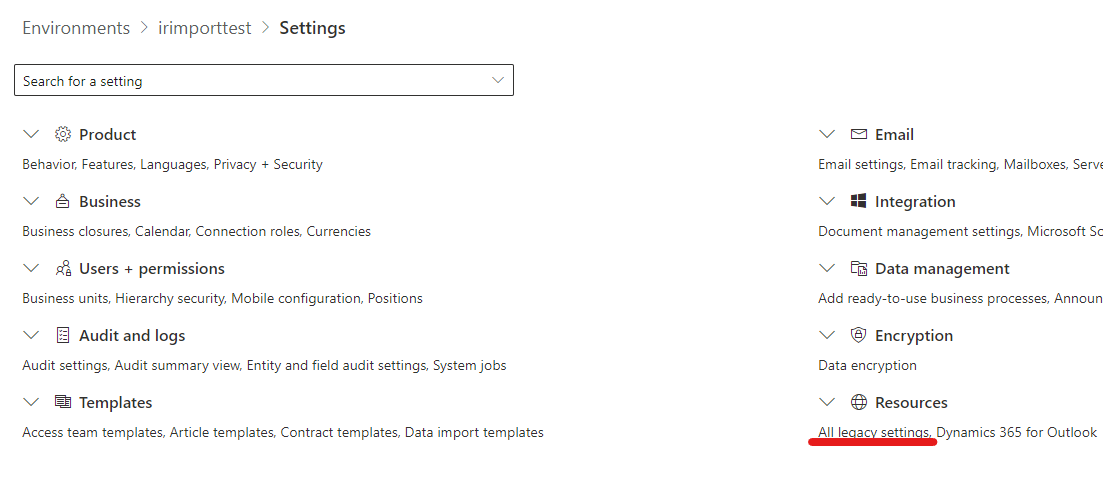
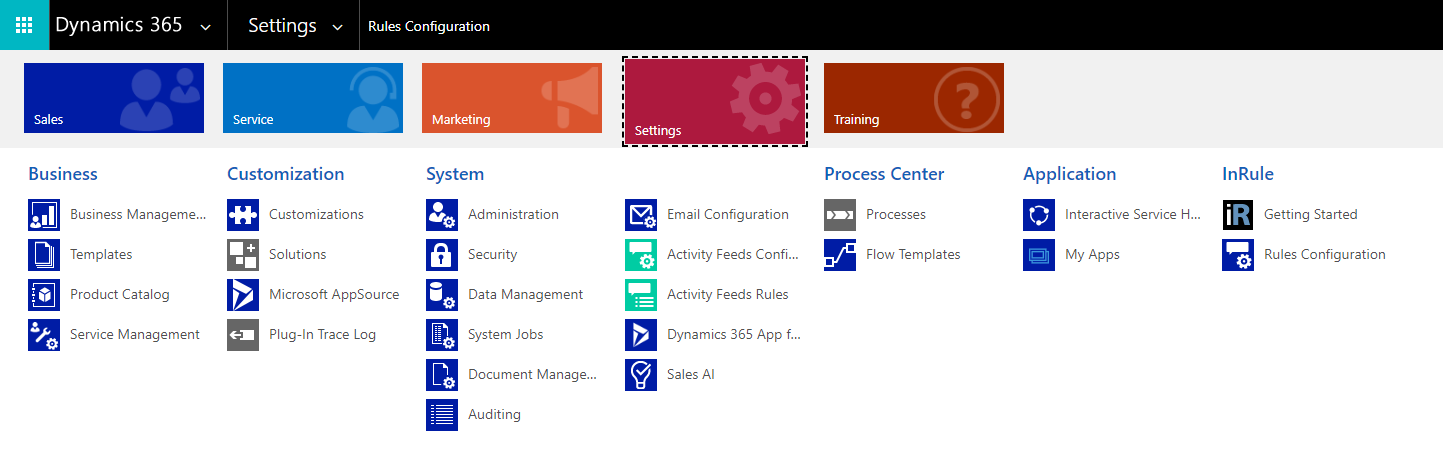
If you are already logged in to Dynamics 365 or a Power App, click on the settings cog in the top right and go to Advanced Settings. Alternatively, if you are in Power Platform Admin center, go to the settings for your environment and then click on All legacy settings. From the settings menu, select Rules Configuration under the InRule section.
Navigate to Settings in Dynamics
Navigate to Settings in Power Platform
-
From the settings menu, click on Rules Configuration under the InRule section
-
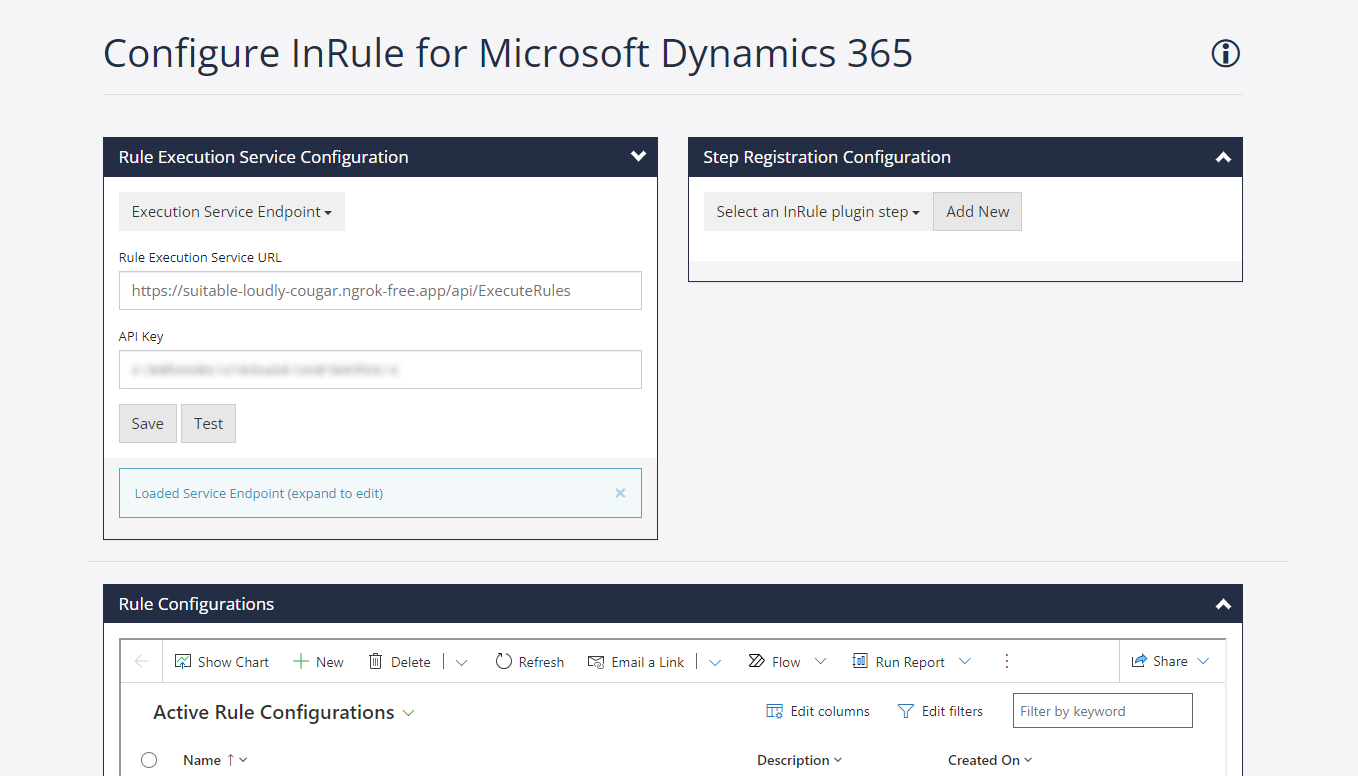
The Rules Configuration page contains 3 panes: Service Endpoint Configuration, Step Registration Configuration, and Rules Configuration. The following steps will focus on Rules Configuration, then Step Registration.
-
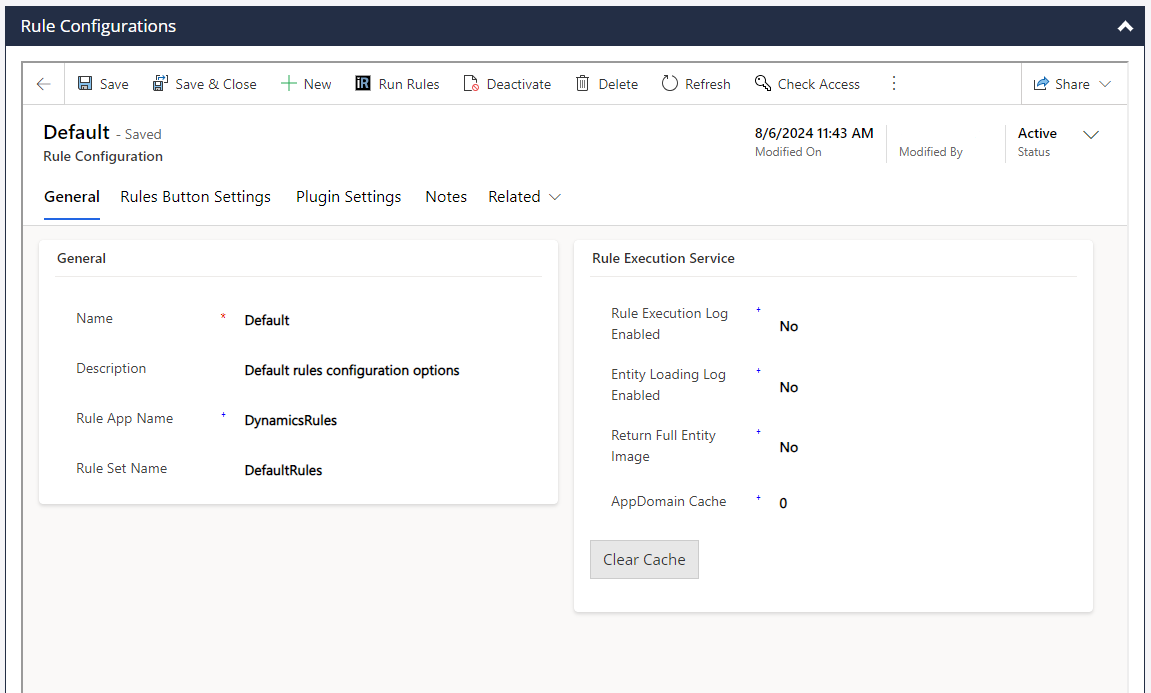
Either add New or select an existing Rule Configuration record (e.g., Default). The following steps use the Default record, but since Default is more of a global Rule Configuration, you should consider creating a new Rules Configuration specific to the entity that you want to associate to the Run Rules button. Select either a new or existing Rules Configuration record to edit:
-
Configure the General Settings for the Rule Configuration as follows:
-
Choose a Name
- for a Rule Configuration that will be used for a specific entity (which is typically the case), it's best to create a name that represents the entity along with the purpose of the rules (e.g., LoanEligibilityConfg)
-
Enter a Description
-
Enter the Rule App containing the Rule Set or Decision
noteThis setting is used as a global/default setting when individual Rule Set Configurations are not provided in the Rules Button Settings section. If the Rule Configuration is being associated to an entity event, then use this setting. If the Rule Configuration is being used for the Run Rules Button, then use the Rule Set Configurations in the Rules Button Settings section and this setting can be left empty.
-
Enter the Rule Set or Decision to execute
noteSimilar to the Rule App setting, this setting is used as a global/default setting when individual Rule Set Configurations are not provided in the Rules Button Settings section. The same logic applies for when to set this field as compared to when to use the Rule Set Configurations (described here).
-
Press Save in the top-left corner
-
Configure Rules Button Settings
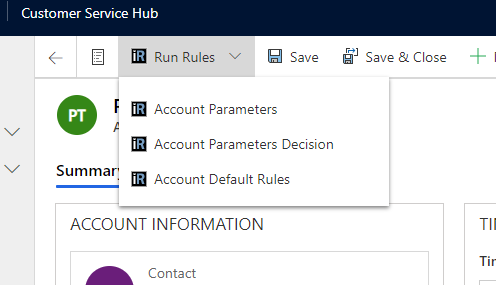
Out-of-the-box, the Run Rules button is scoped to only run the default rule set that is specified by the Rule Set Name field on the 'Default' Rule Configuration. However, you also have the option to add additional Rule Set Configurations to allow one or more rule sets/decisions to be selected from the Run Rules Button. When these are added, the Run Rules Button will display a drop-down menu to allow the end user to select from a list of rule sets and decisions. To enable this functionality, follow the steps below:
-
Create or update a Rule Configuration as described in the previous step.
warningUnless you want this list to appear on all entities, do not modify the 'Default' Rule Configuration record.
-
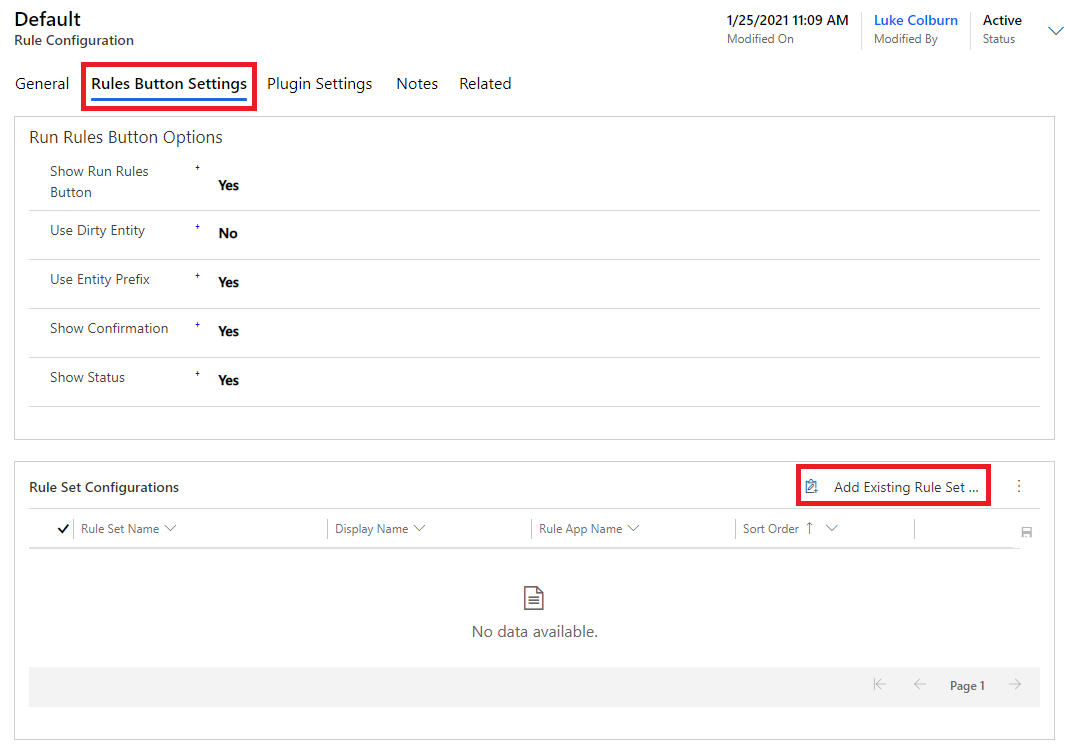
The Rules Button Options can typically be left as the default values, for a complete overview of these settings go to An Explanation of the Rules Button Options.
-
Under Rules Button Settings, click the Add Existing Rule Set Configuration button on the 'Rule Set Configurations' sub-grid. From here, you can search for an existing Rule Set if you have already created one as part of another configuration, or you click New Record to create a new record
-
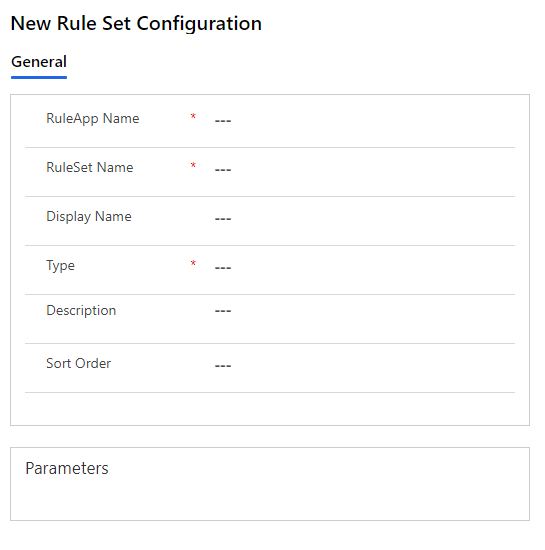
If you choose to create a new record, fill out the fields on the form that pops up. Rule Set Name, Type, and Rule App are required. Optionally, you can provide a Display Name, which will be displayed in the drop-down instead of the Rule Set Name. Sort Order is also optional and takes an integer which will be used to sort the Rule Set list in ascending order.
 note
When running rules using a Decision, the decision authored in irAuthor must have an input parameter with the entity type you are running rules against. Additionally, any output parameters are not used by the framework, as the same entity is used as output.
This root entity parameter is provided by the framework automatically and does not need to be defined in the Rule Set Configuration page (only in the Rule Application Decision definition). For more information on how to configure other input parameters for your rule set or decision, refer to Using Input Parameters for Rules.
-
Associate the configuration record above with the entity you'd like the list to appear on by following the steps in Associating an InRule Configuration record to an Entity
-
Go to the entity page for the configuration that you have just edited and ensure that the Run Rules button now has the desired rule set or decision options listed.
Using Input Parameters for Rule Sets or Decisions
If you need to collect information from end users that is not on an entity form, you can use rule parameters for the user to enter at runtime. If you configure a rule set or decision to use parameters, when a Dynamics user clicks on this rule for execution, they will get a dialog to allow them to input the parameters.
This functionality is not supported in on-prem environments, and is not intended for use with Dynamics events.
To enable this behavior, you will first need to add the parameters to the rule set or decision in irAuthor. InRule for Dynamics supports all the primitive parameter types, but not entity parameters. However, these are all collected as string values and converted in the execution service, so the end user must ensure the values are formatted properly when providing them:

When defining a Decision, the decision authored in irAuthor must have an input parameter with the entity type you are running rules against. Additionally, any output parameters are not used by the framework, as the same entity is used as output.
Next you will need to edit the Rule Set Configuration record to use this rule set or decision, along with its associated parameters. In order to get to this point, you should have already gone through these steps:
- First set up a config record if you haven't already done so according to Updating InRule Rules Configuration Records.
- Next add an associated rule set config record following the steps in Configuring the Run Rules Button for an Entity Form.
After filling out the form fields and saving the record, you'll now be able to add parameter config entries in the Parameters sub-grid.
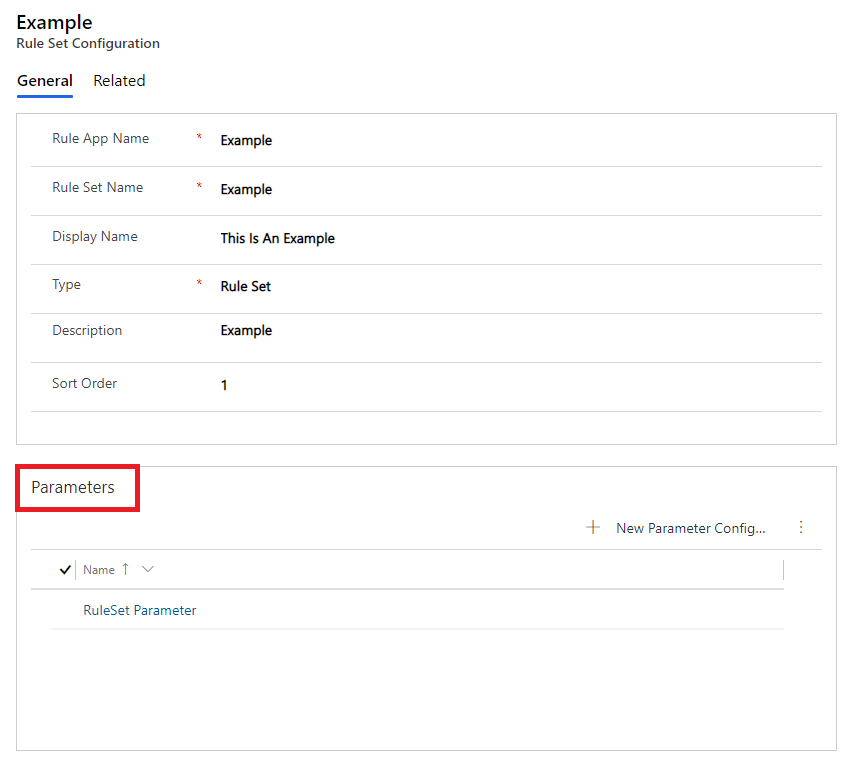
When adding a parameter, you only need to provide the parameter name, and optionally a description. Repeat this process for each parameter you want to add. Once parameters are added to a rule set configuration, the Run Rules button will automatically display the parameter input dialog to users.
Associating a Rule Configuration Record to an Entity
If you want to use different Rule Configurations for different entities, you can create multiple configuration records and then associate them to a particular entity. The same configuration record can be associated to multiple different entities if desired. For Rule Configurations you wish to use with the Run Rules Button, inrule_RulesEngineAction will be the SDK message you select.
Please note that if you wish to associate an inrule_RulesEngineAction to a specific entity type, this will override the "default" custom action step. The "default" inrule_RulesEngineAction is a "global" custom action step registration which all entities will default to using until you register a custom action step for a specific entity type.
-
Create or update the configuration record according to the previous steps
-
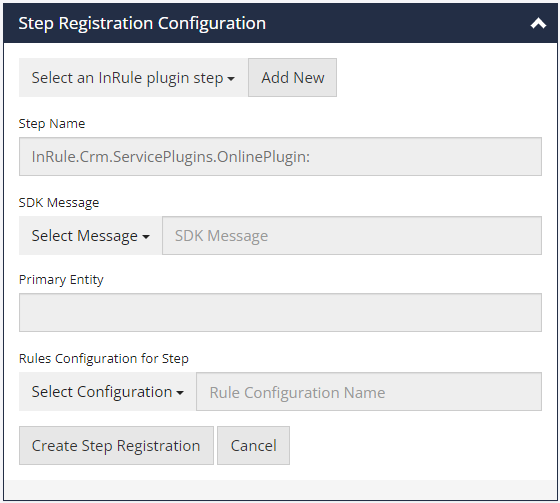
Return to the Rules Configuration page and navigate to the Step Registration Configuration section and click Add New
-
Choose the SDK Message (Update, Create, inrule_RulesEngineAction)
- Update – Update of the primary entity
- Create – Create of the primary entity
- inrule_RulesEngineAction – The custom action message invoked when the Run Rules button is clicked. Choose this to override the default behavior for a particular entity whenever the Run Rules button is clicked, custom JavaScript is executed using the included invokeCustomAction.js resource, the workflow activity is used, a form event is used, or the custom action is invoked through some other means.
-
Select a Primary Entity for your rule registration to use
-
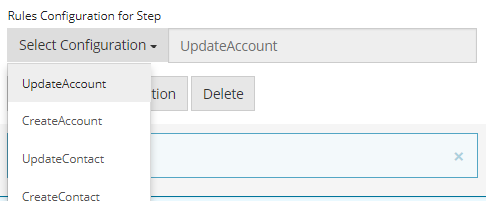
Open the Rule Configurations for Step drop-down menu that appears and select the Rule Configuration that you made above.
-
Click Update Step Registration and verify that the registration successfully saves

An Explanation of the Rules Button Options
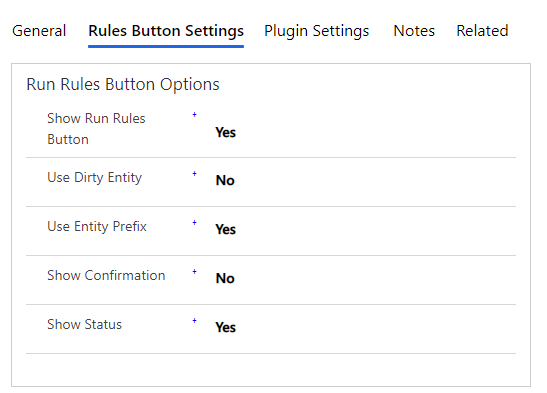
The below options must be passed into the InRule Custom Action. InvokeCustomAction.js exposes InRule.executeRules() which will use values defined in the InRule Solution – Configuration Form. Alternatively, a consumer of InRule.executeRules() can pass in an object that provides specific values that should be used on a call by call basis
| Option | Description |
|---|---|
| Show Run Rules Button | If true, then the Inrule Run Rules Button will be visible on all pages. If false, then the InRule Run Rules Button will be globally removed. This will only affect the use of the button, but not other registered plugin steps. |
| UseDirtyEntity | If true, the InRule Custom Action will expect that form data will be included in the API call. The form data is used to populate the root entity in the Rule Engine. This is useful in scenarios when data has changed on the Dynamics form but the save button has not yet been pressed. This allows a user to run rules against data before a save takes place. If false, the only data passed to the Custom Action is the Entity ID (guid) of the entity, and the Custom Action will query Dynamics directly for that entities data. This limits the InRule Custom Action to being aware only of data that has been fully saved to Dynamics. |
| UseEntityPrefix | If true, then the supplied RuleSetName is interpreted as a suffix to the EntityTypeName. For example: if the supplied RuleSetName is "DefaultRules" and the EntityTypeName you are dealing with is "Account", then the RuleSetName actually used will be "AccountDefaultRules". If false, then the supplied RuleSetName is interpreted literally. |
| ShowConfirmation | If true, this will ask the user in the User Interface with the following visual prompt before actually executing rules: |
| ShowStatus | If true, a status message will be displayed within the Dynamics interface when rules are executing, when rules are finished, and if rules are cancelled by the confirmation dialog.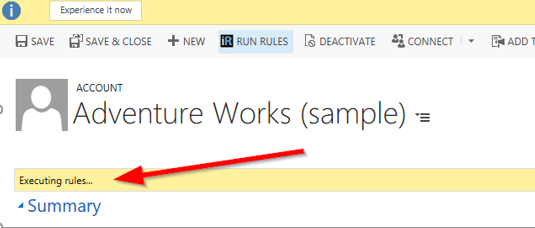 |
Displaying Additional Logs and Response Data in Trace Logs
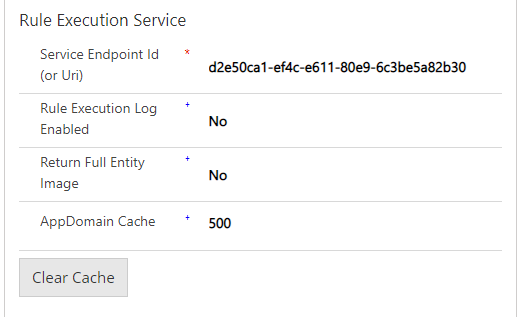
The rule execution service generates logs that are helpful for troubleshooting rule execution, but by default these are only logged on the execution service itself and not returned in the response to reduce response size and avoid trace log truncation. However, for convenience different log sections can be configured to be returned in the response and logged to the plugin trace log. These sections are:
- Rule Execution Log: The flow of rules and changes in state during rule execution
- Entity Loading Log: What and how many entities are loaded on the rule execution service before rule execution, and how long it takes to retrieve these entities from Dynamics. More details can be found in Execution Service Performance
- Entity Image: The complete root entity in JSON format including changes from rule execution
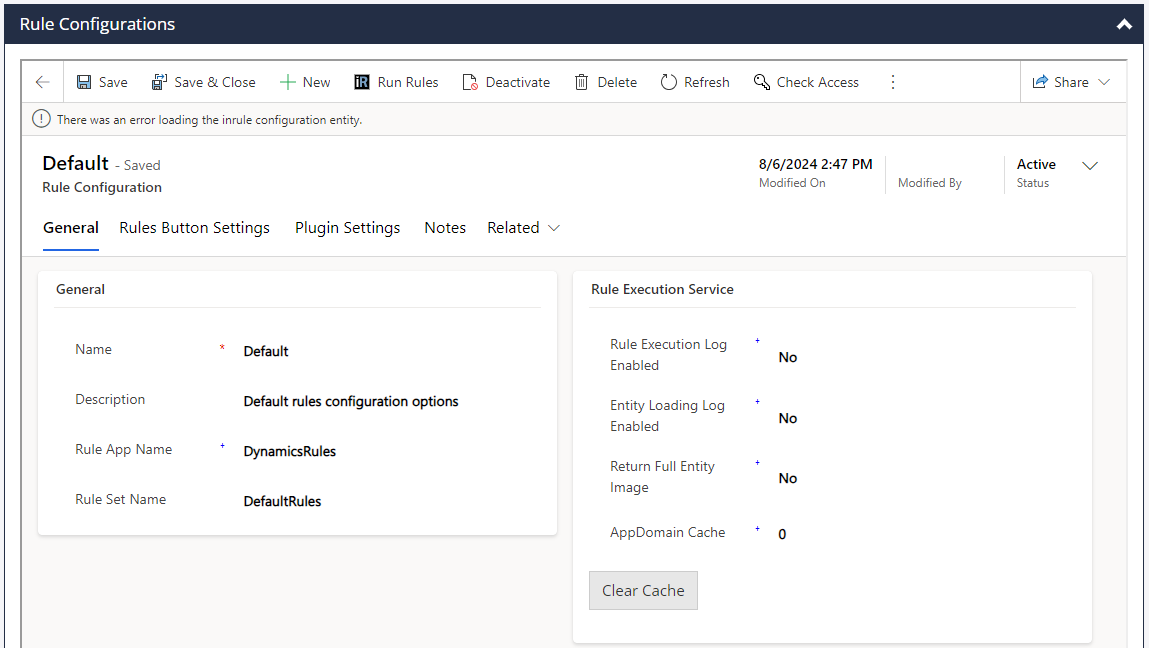
When enabling these options as much as possible will be logged, but due to character limits in the plugin trace log some data may be truncated. By default all of these options are all off, but they can be enabled with the following steps:
-
Navigate to the InRule Solution Rule Configuration Form
-
Scroll down and select the 'Default' record under the 'Rule Configurations' section. Please note that the change made in this specific record will take effect across the whole system.
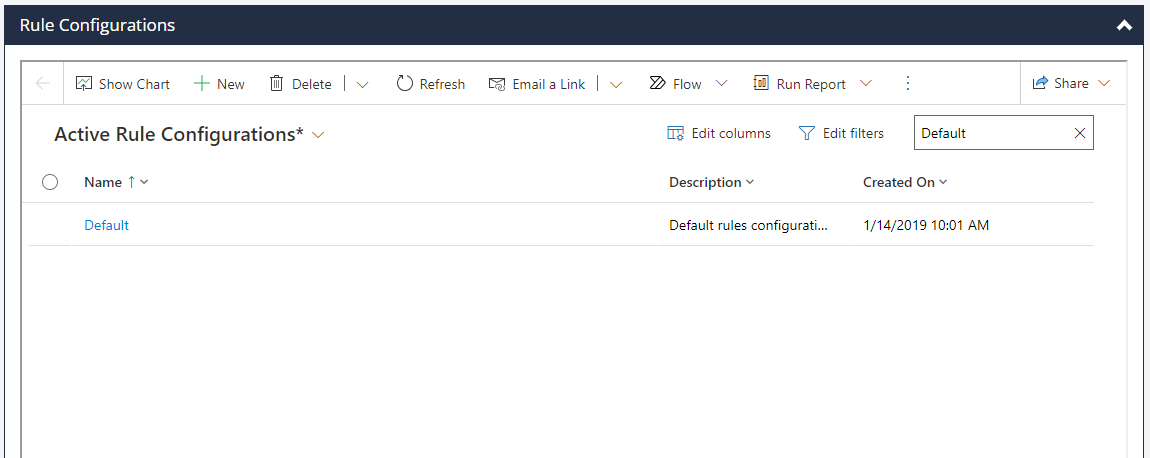
-
Switch to 'Yes' any of the logs you'd like to be returned under the Rule Execution Service section and save the config record:
Disabling the Run Rules Button
Out-of-the-box, the Run Rules button is used to manually initiate the execution of rules. In some instances, the Run Rules button may not be needed, and the button can be disabled as described below.
-
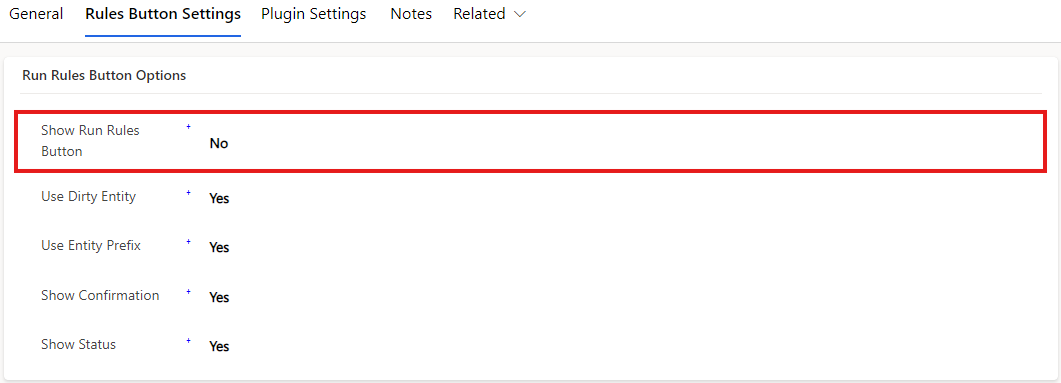
Create or update a Rule Configuration according to Create or Update Rules Configuration Records. If you want to hide the button for all forms on all entities, edit the default record. Otherwise, create a new record for the specific entity you'd like to show or hide the button on.
-
Set the Show Run Rules Button under the Rules Button Settings section
-
If you edited the default record, you can skip this step. Otherwise, you'll need to associate the Configuration record you just modified with a particular entity by following the steps in Associating an InRule Configuration record to an Entity
Changing the Max Plugin Depth
Dynamics provides the plugin depth property to the plugin context to track the current depth of the call stack. Whenever another plugin or process is executed within the scope of the current transaction, this value is incremented by 1 in the invoked plugin. This value is commonly used to prevent infinite loops, where multiple plugins keep firing each other. The Max Plugin Depth setting in the InRule Configuration will stop execution of the plugin whenever the depth is greater than the specified value. By default, this value is set to 1, but you may need to change it in certain cases, such as using the included custom workflow activity, or running rules from within your own custom plugin. To update this value, change the 'Max Plugin Depth' setting using the steps in Updating InRule Rules Configuration Records, and optionally associate the record with a specific event and entity by following the steps in Associating an InRule Configuration record to an Entity
Disabling Persist Changes
When Persist Changes is set to enabled all changes made to all entities by InRule are persisted back to Dynamics. When disabled any changes made by InRule are sent back in the response and can be consumed by the caller, but they are not persisted back to Dynamics.
The Persist Changes setting can be found in the Plugin section of the Rule Configuration.
Configuring the AppDomain Cache
When using the Rule Helper, the integration framework provides the ability to save query results in a persistent cache in the execution service AppDomain. This is useful if you have relatively static data that is used consistently in one or more rule apps, since this cache persists across rule executions. By default, this cache is disabled, but you can enable it by setting a value for the cache timeout in the Rule Configuration. To update this value, change the 'AppDomainCache' setting to the desired retention time in seconds using the steps in Create or Update a Rule Configuration Record, and optionally associate the record with a specific event and entity by following the steps in Associating a Rule Configuration record to an Entity.
The AppDomain Cache can be cleared prior to its configured duration in three ways:
- The Clear Cache button, available right underneath the configuration field
- Resetting the cache value to zero. This causes the cache to be cleared the next time the rule helper is used from the execution service
- Restarting the Rule Execution Service
For more information on how to use the rule helper, refer to Accessing Dynamics 365 Directly from Rule Helper
Calling ApplyRules (Auto Fire Mode Rule Sets)
To execute a Rule Set with its Fire Mode set to "Auto," simply do not define a Rule Set for your rule configuration and associate that rule configuration to the entity type that your auto Rule Set is associated with.